 kasploosh.com
Shelf Shuffle
2012-06-20
This was a simple, fun project to disassemble and reassemble some shelves in a way that I thought would be an improvement.
Existing Shelves
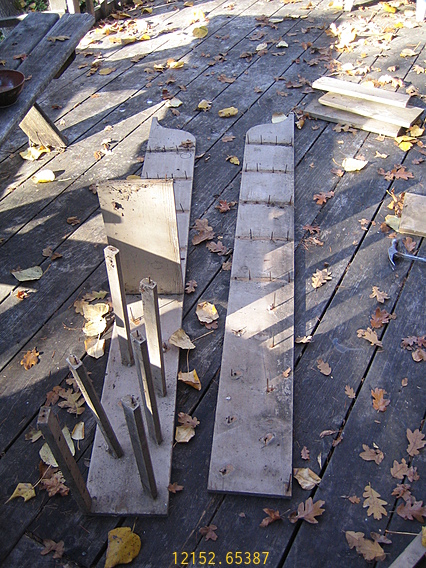
Forgot to take a photo before I started knocking it apart
I found a strange set of shelves in the barn next to where we were staying. They were very dusty and dirty, from living in the barn for many years.
I forgot to take a photo of them as I found them, so this shot taken just after they were knocked apart will have to do.
Here were things I thought about when I saw these old shelves in the barn:
- What were these shelves for?
- What are these weird angled parts all about?
- I can see why these are just sitting in the barn.
- I wonder if this wood is any good?
- I wonder if I can make anything out of this wood?
- Can I just take this thing apart and rearrange it into something better?
The wood was pretty good, because it was many-years-dry and the pieces were all straight. I counted up the pieces and figured they could be arranged into something better.
Shelf Mystery
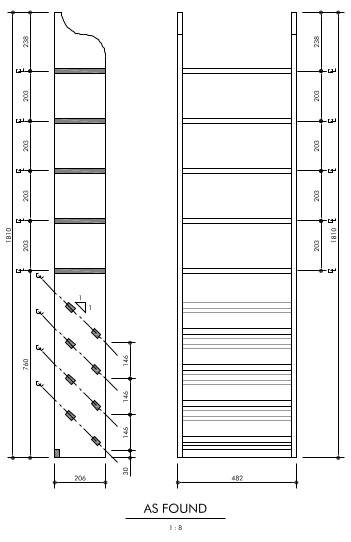
Before going on to the project, we have to spend some time on the mystery. What need were these shelves created to fill? I know I didn't take a photo of the whole thing while it was assembled, but through the magic of measured drawings, I present to you a plan of the original shelves.
Firstly, I do not know if I have oriented the plan correctly. So when you are gazing at the plan trying to imagine what function it served, please also turn your head upside down to see if that triggers any insights.
The shelves were only 8" apart, and that might give some clue about what the overall function of the shelves had been. A narrow spacing of 8" would not be good for much, but would be good for jars and cans in the pantry.
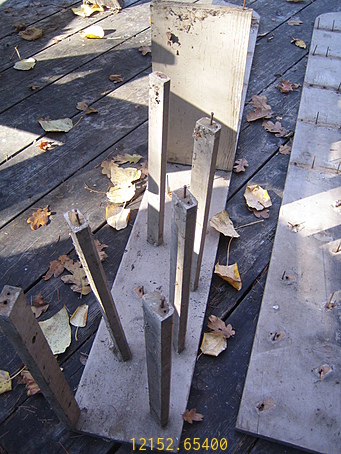
What were these angled parts for?
Most importantly, whether upside-down or right-side-up, what are the angled jobbers supposed to be doing? I don't think they are for shoes, which would slide right off. I don't think they are for draping quilts, which could more easily use a shelf. I don't think they are for newspapers. I don't think they are for bowls because they are too evenly spaced. What are they for?
Disassembly
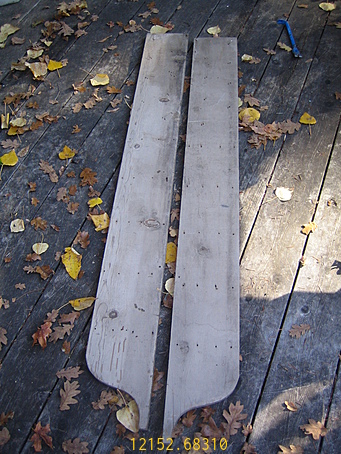
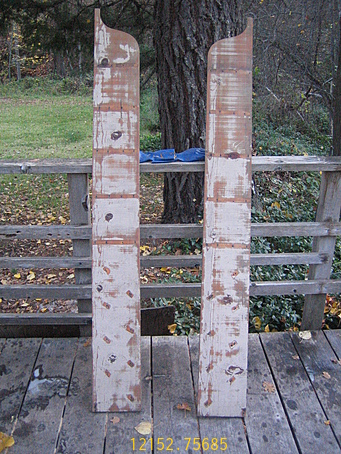
The long pieces after disassembly
The shelves were just nailed together with common nails, so it was not too hard to take them apart. I did take care to not damage the wood during disassembly.
Some nails were stuck enough that they pulled through the wood rather than let the pieces pull apart. For those I clamped the wood to a solid surface and used vice grips to twist and pull the nail out, in order to not damage the wood. This is a very exciting story about the disassembly process.
The original builder had used only nails, and no glue. That made it easy to take apart and repurpose the wood. I'm not sure if I returned the favor when I built the new shelves. I believe I did build the new shelves dry, and only used nails.
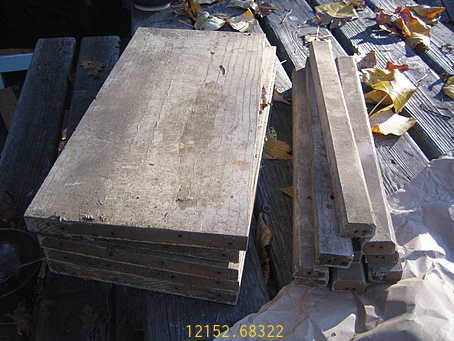
The short pieces after disassembly
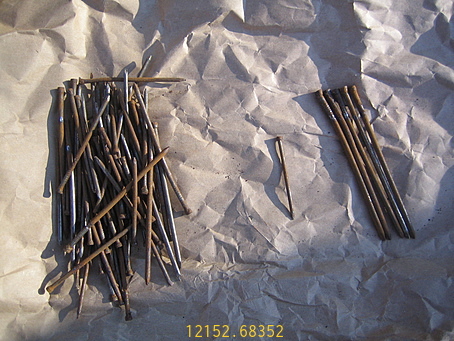
The total nails used for the original shelf assembly, sorted by penny
Cleaning
The long pieces after cleaning
The existing paint was powdery, and the wood was dirty. I swept everything off, then sanded the pieces to remove all the paint that was no longer good. I tried to get everything down to good paint or bare wood. There was no need to strip the paint, since I was going to repaint them immediately.
After sanding, the wood was still dirty with dust, paint powder, and dirt. I washed all of the pieces with soap and water, and set them out to dry.
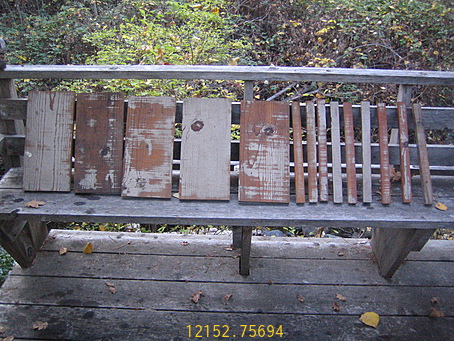
The short pieces after cleaning
New Design
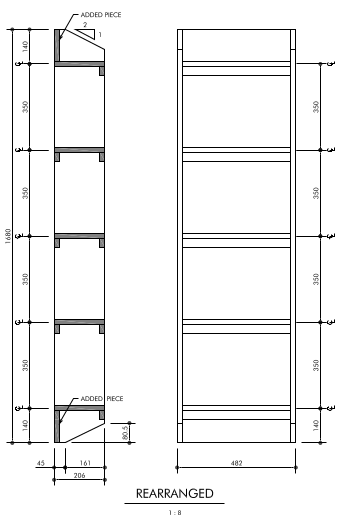
The new design
I made the final plan for the shelves the same night as the disassembly. You can see the new plan at right.
There is nothing complicated about the plan. I cut both ends off the long pieces, including the ogee shape, to get a fresh start. I trimmed the long pieces to a decent round number.
I went for evenly spaced shelves, for a good amount of capacity on each shelf. I tried to get a pleasing symmetry at the top and bottom with the simple chamfer detail.
All of the mysterious angled jobbers became supports for the shelves, to reinforce them in their weak dimension. This is so the shelves are less likely to deform when I store my gold bars on them.
Note that I cheated and added two new pieces of wood that were not in the original project. These added pieces are the strong points where the shelves can be mounted to a wall.
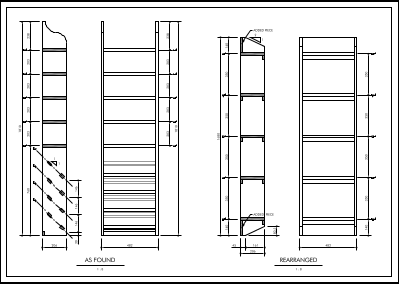
Click to download the PDF set
If you are interested in the design or in the plan drawings, please download the PDF by clicking the image. The PDF contains much clearer versions of the drawings in this article.
Outcome
These were a pleasure to nail up because the wood was straight and dry. I painted the final shelves battleship gray.
One good thing about these shelves is that they can fit in a tight space and don't take up much room. Also, they mount to a wall, so they don't take any floor space. But you can still put lots of little things on them. I use them to store boxes containing miscellaneous small parts..