 kasploosh.com
The Cabinet Body
2012-06-19
Building the cabinet was interesting and rewarding. It required a lot of planning to get the exact size for all the pieces. And it took some effort and attention cutting all the pieces to the design size. But once they were all cut correctly, it was fun to assemble, because everything fell in place.
Materials
The 3/4" plywood parts (two sides, floor, interior partition) were made from some good birch plywood.
The top was made from a vintage piece of 7-ply 1-1/8" plywood decking. It was not a fine piece of plywood, and the surfaces had a lot of “personality”. But when I put clean cuts on the side, and cut it square, it started to look good. The cutting exposed voids in the edges, which I filled with epoxy and filed back to flush.
The solid wood parts (face frame, supports) were made from a wood that I got from a sawmill not too far away. This place had many piles of various woods. I believe I got chinquapin (Chrysolepis chrysophylla), because that’s what I asked for, but I'm no expert in identifying unique species of wood. It’s different from other woods I am familiar with, and it was pleasant to work with. It is neither a hard wood nor a soft wood, and has a very even grain. I took only the few boards necessary for this project. They were all rough-sawn 1" boards.
Getting Pieces Ready
I used CAD software to plan for how all the pieces would interact, and how big they needed to be. This was made more complicated by the fact that the solid wood was rough-sawn and needed to be planed to an undetermined finished size. The final thickness for the solid wood wound up being 13/16".
Plywood pieces were cut to their final design size. Most of the solid wood was cut to width, but left long. Then it was cut to length only when it was put in place.
Fabrication
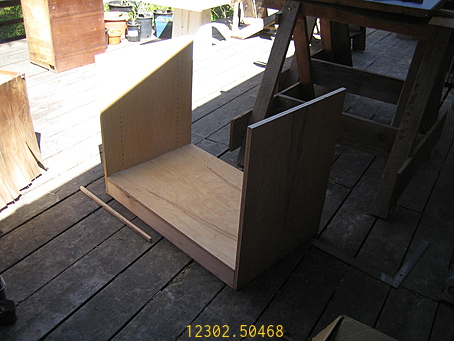
Assembling the cabinet parts, sides and floor
Assembling the cabinet was fun, and like putting together a kit of parts, where everything fell in place. Everything was done with glue and finish nails. There was really no need to use screws, because of how all the parts tied into each other.
Finishing
There was nothing unusual about the finishing process. I did a lot of sanding, and a lot of coats. I used an oil-based polyurethane with a “Satin” finish.
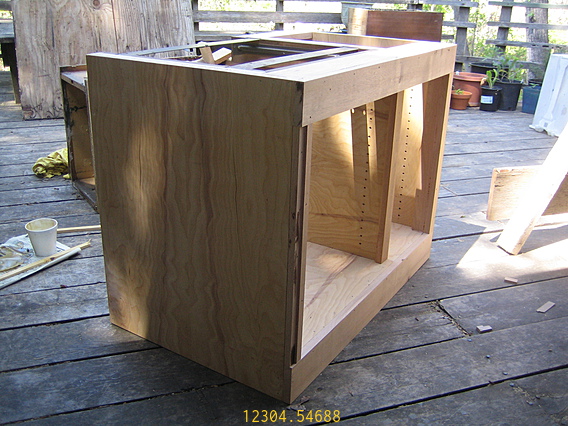
The cabinet body during the finishing process
The plywood top was dyed yellow and finished with a glossy oil-based polyurethane.