 kasploosh.com
Colors and Finish
2013-11-15
Sample pack color scheme
The first time I did this project, I went with red. The second time I went with blue. I wasn’t satisfied with either of those. The colors were nice, but there was too much of each color.
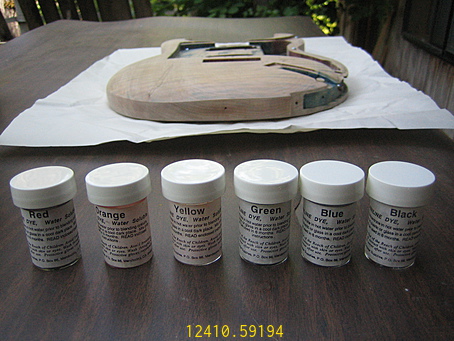
I had this sample pack of aniline dyes where I liked every color in its own way, but did not like any of the colors enough to have a whole guitar of it. That’s how I got the idea to use every color from the sample pack, and make a multicolor guitar.
I was excited about the idea of a “sample pack color scheme”. Can’t decide? Use them all! And because all the colors at once is the best color of all.
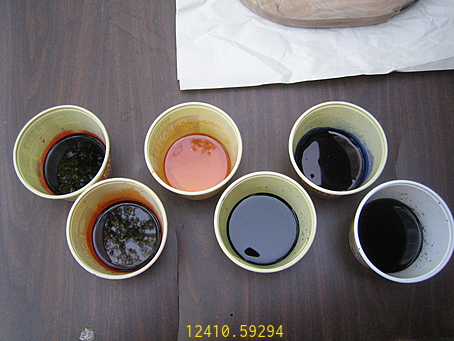
Sample pack colors
This is what the dyes looked like the day I applied them. I didn't have any spray equipment, like the pros would, to get even fades. I just had a couple of tubs of color.
First Color Application
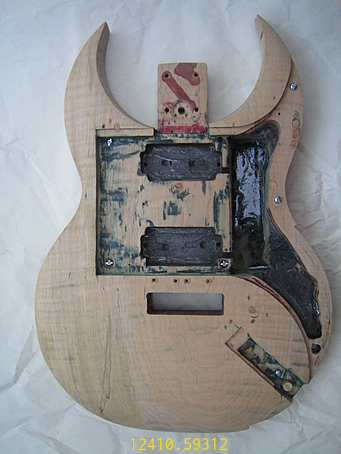
Ready for color
I wanted to get this project done in a timely fashion, so that it did not linger on forever. With that in mind, one fine day I mixed up all the dyes and started applying them.
I didn’t have a clear plan. That’s a small mistake. I knew I didn’t want the colors applied systematically, and that’s probably why I was coloring without a plan.
But on the other hand, I needed to advance this project, so I improvised a little to force the issue.
:c)
At right is how the blank canvas appeared that day. This is after final sanding and fitting of cover plates. You can still see ghosts of the blue and red from previous phases, in places where it won’t matter.

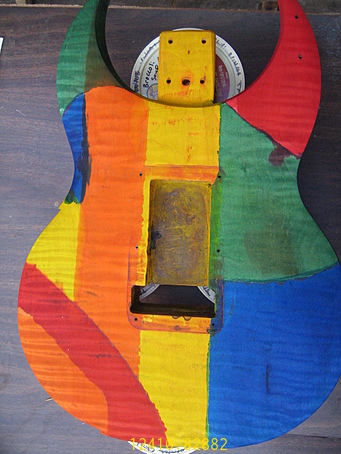
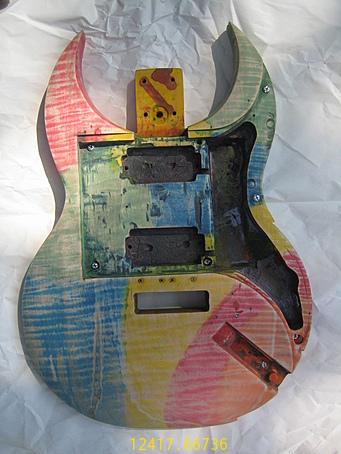
After first color - front
Here is what the front looked like after the first day of coloring. I really had to laugh at myself, because I felt like I botched the color when I got this result.
Yes, each of the colors is represented. Yes, they are not applied systematically. On those fronts it was a total success.
But the overall effect is not that great. It’s a little random looking, like a windbreaker made for the summer Olympics.
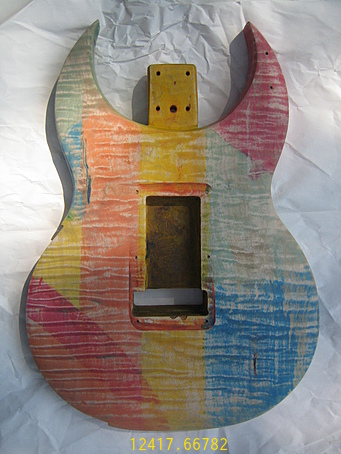
After first color - back
As bad as the front looks, the back looked even worse. Even more patchwork and random looking. Weird, colorful, but not totally pleasing.
Sand Back First Color
Sand back first color - front
Lucky for me, there was the idea of “double staining”. The idea of double staining is to first stain your wood with a dark stain. Then sand the wood to partially remove the stain. Sanding will remove the stain at different rates depending on the wood grain.
When you partially sand away the stain, the parts that remains accentuates the wood grain. This procedure works well particularly if the wood grain looks interesting.
Most examples of double staining use a dark first stain, sand it back, and then do a thinner top stain. The result is a wood grain that looks 3-D after the top coat is applied.
Sand back first color - back
In my case, I just sanded back the first color stain. That would leave ribbons of color in the pattern of the first stain. I would then apply more color in a new pattern. The old colors underneath would mix and integrate with the new colors on top.
If some color is good, more color is better, right?
Second Color Application
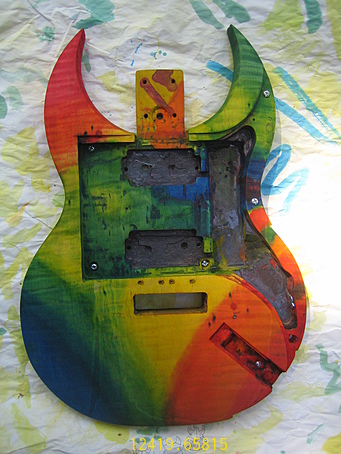
Second color
After I was done sanding back, I did the second color application of the double staining process. This time I did sketch out a few options, so that I didn’t create an unrecoverably mess.
This photo is taken just after the second application of color stain. I think it has a pleasing look, better than the first application.
The double staining technique did bring subtle variety to the project. Every color from the sample pack is represented. And the overall look is nice.
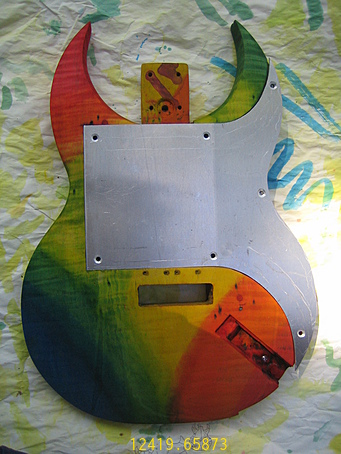
Test fit cover plate
I couldn’t judge the colors without test-fitting the cover plate. The cover plate is so big and silver that it has a large effect on the overall look.
Note that these colors were taken just after staining, when the colors were at their most opaque and saturated. I later sanded back the stain with fine sandpaper, to carefully bring up the wood grain.
Spray Day
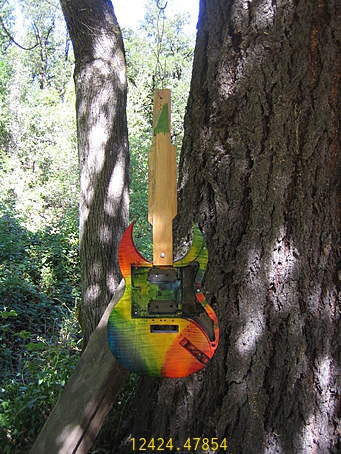
Sophisticated spray setup
This was my very sophisticated spray setup. On a nice calm day, I hung the guitar body under a tree in the back yard. I sprayed on multiple thin coats, building up a finish, until I was out of lacquer.
The finish I used was nitrocellulose lacquer in a spray can. I don’t remember the brand, but it was something I found at my local hardware store.
I built and attached a temporary neck to the guitar. The temporary neck allowed me to move the body without touching it. It also allowed me to suspend the body from a wire, while keeping the wire far away from the work area. And the temporary neck kept lacquer out of the neck pocket. I wanted wood-to-wood contact between the body and neck.
Applying spray finish - front
The front during the spray process. Note that this is before sanding and buffing, so the finish looks matte.
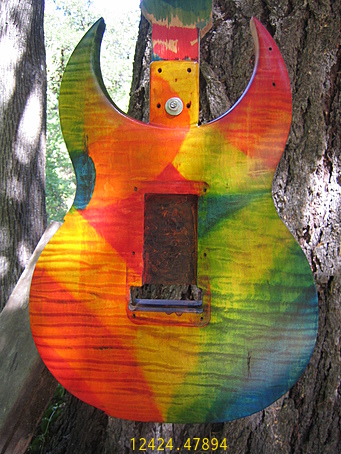
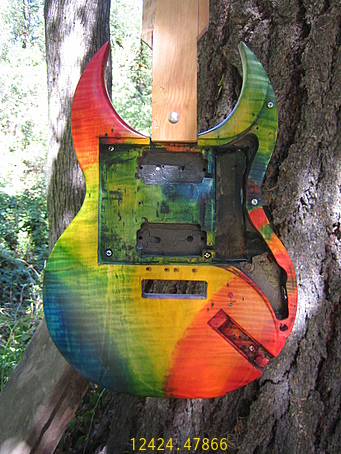
Applying spray finish - back
Polishing
I don’t have photos of this phase. First I let the lacquer dry for a long time, to make sure it was really dry. Then I sanded the body with very fine sandpaper. Then buffed the body with a cloth wheel and fine buffing compound. This is a tricky part of the process which creates a glossy finish.
Color Negatives
I am satisfied with the multicolor scheme I eventually retrieved, and the glossy finish. After all, this is just a project for myself. But if I could go back to the blank canvas and start the color over, I would change these things:
- Use traditional double staining. First coat with a uniform dark stain, such as dark blue or even black. This would do more to accentuate the wood grain than what I accomplished.
- Have a well-developed plan of what-color-where from the beginning. No improvising. A guitar body is so small and encapsulated that you should know where every color goes in advance.
- Spray rather than brush the color stain. I have a few sharp edges in the finished project that I don’t like. I would rather the colors blend a little better.
Are these negatives enough to bring on a fourth phase of this project? I doubt it! But, then again, I might be bored in ten years and in need of a project.