Quick Shelves Project
2008-02-20

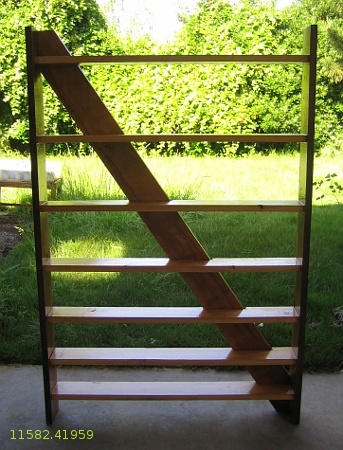
Finished shelves, just before installation
This project was not super fancy. I have a collection of scrap wood which grows and recedes over time. It's a fun exercise to try to marry those scraps with some need around the house. If the exercise is successful, you will have satsified a need AND gotten rid of some scrap wood.
I had several pieces of 3/4 inch material that I was thinking I would use for shelves. My idea for the shelves was to make something that had the size and shape of a painting, and could be hung on the wall like a painting, but was actually a set of shelves for diverse doodads. Once the shelf was full of doodads, it would be like a collaboratively made 3-D painting. That was the idea.
Design
The design was a fun mathematical exercise of taking some existing pieces of wood, and calculating how best to turn them into a pleasing rectangle. I wanted the overall dimensions of the rectangle to be within a certain range, and I wanted the spacing of the shelves to be interesting and appropriate. And I wasn't buying new material, so that introduced a constraint on the design.
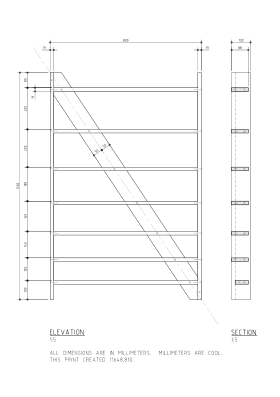
The PDF plan shows the results of the design phase.
In summary, I used an 800x1200 millimeter rectangle, which is a 2:3 ratio. The shelf spacing varies from 120 millimeters to 220 millimeters, to accommodate a variety of doodads. A diagonal brace follows a line drawn from one corner of the rectangle to the other. And the whole design is invertable, so the small shelves can be on the top or bottom.
Construction
The project was accomplished with only a circular saw, so the scraps of wood were cut to length, but not ripped. The varying widths of wood were instead incorporate into the design.
The side pieces and the diagonal brace were both taken from a cabinet that was removed from my neighbor's house. The shelf members may have come from the Habitat ReStore.
The hardest part of the construction was letting in the diagonal brace. But it was important to the design, so it was worth it.
The finish was polyurethane that was bought for some other project.
Timeline
The project had a compressed time frame. The whole project went from concept to installed in just four days, and that included the finish drying.
- 11578 - project planning started
- 11580 - shelves constructed
- 11581 - finish applied
- 11582 - shelves installed
- ...
- 11648 - create PDF of plan
 kasploosh.com
